Trigger agents over HTTP
auxilia agents aren’t confined to the chat interface. Every agent can be triggered by a plain web request, which means you can drop them into spreadsheets, automation tools, webhooks, cron jobs, or any other system that can send a message over the internet.
This tutorial walks you through doing that — two requests and a token, no custom code needed for the basic version.
When to use this
- You want an agent to respond to an event in another system (a new support ticket, a form submission, a database row)
- You want to embed the agent’s answer inside another app without re-hosting the chat UI
- You want to run an agent from a script or a CI job
If what you want is a schedule — every morning at 9, every Monday — you don’t need HTTP at all: auxilia has built-in Triggers for that.
What you’ll need
- An auxilia deployment that your team can reach (see Deploy & Configure)
- An agent that already works well in the chat UI — see Build Agents if you haven’t set one up yet
- A personal access token (PAT) so the external system can authenticate as you
Step 1 — Mint a personal access token
A PAT is like a password your tools use to act as you: it carries your role and your agent permissions, and any OAuth MCP server you have connected.
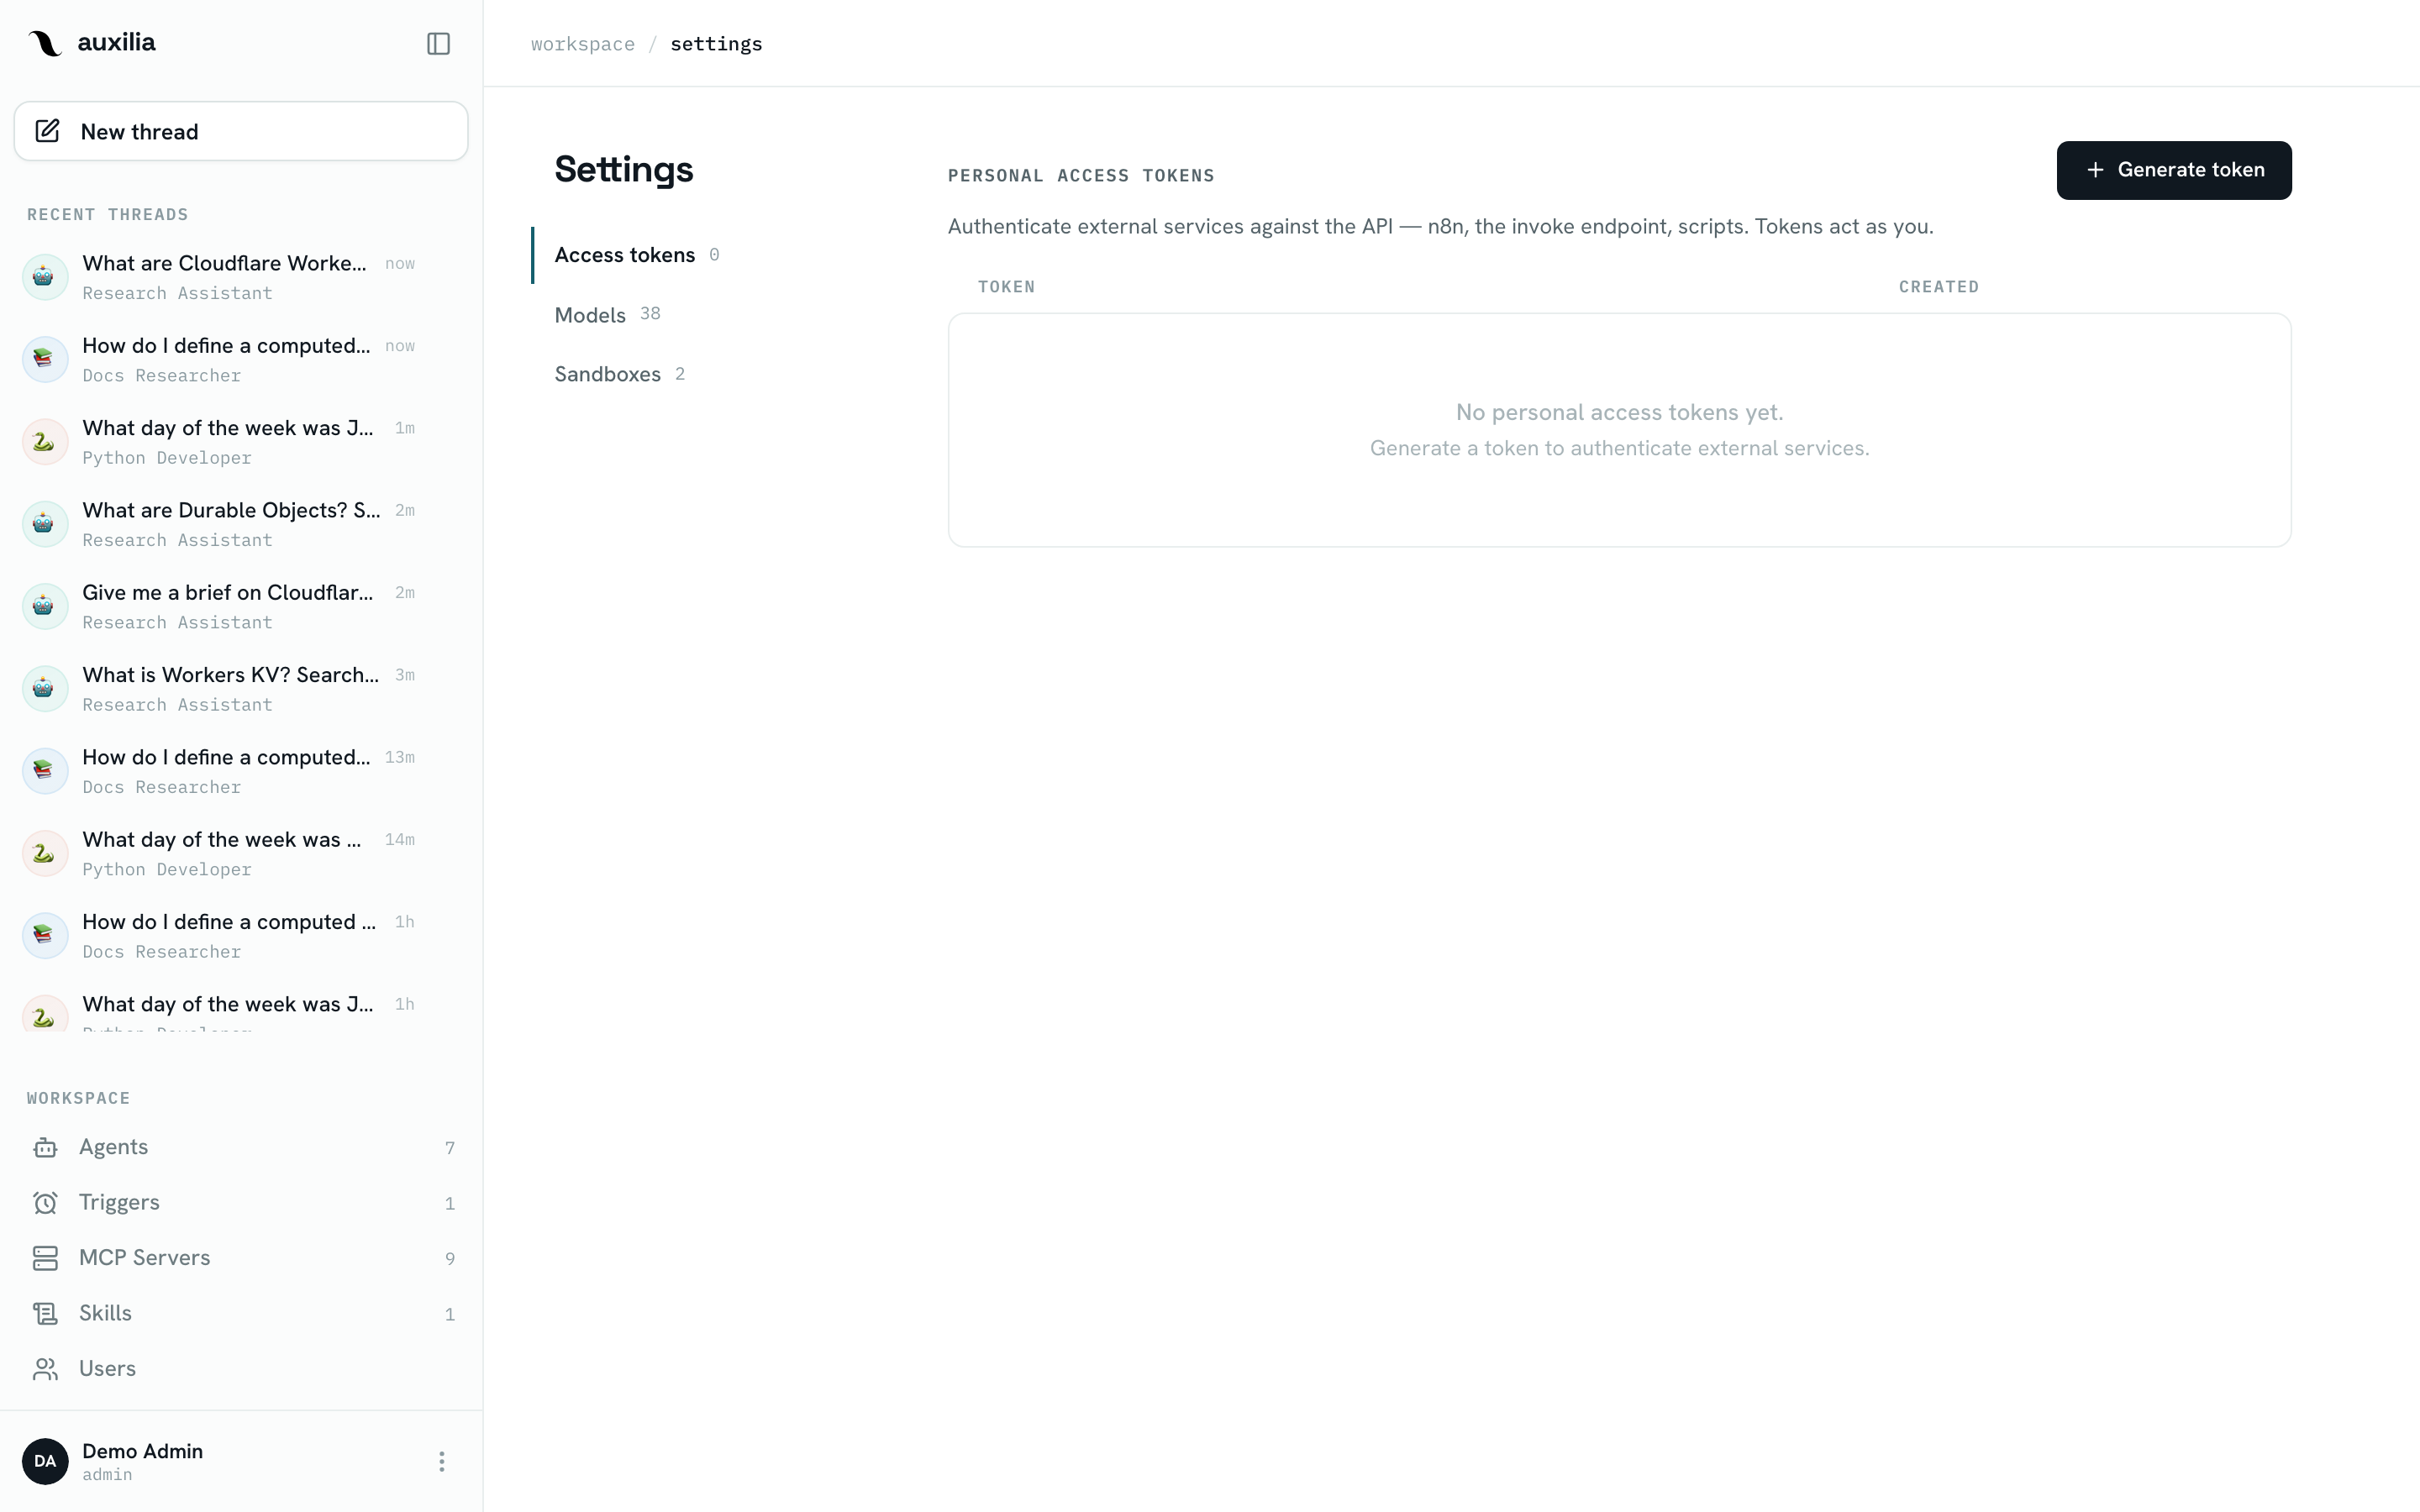
- In auxilia, open Settings (bottom of the sidebar) → Personal access tokens
- Click Create token, give it a name (e.g. “n8n support automation”)
- Copy the token the moment it appears — auxilia won’t show it again
- Store it wherever your automation tool keeps secrets (n8n credentials, Google Cloud Secret Manager, a password manager)
Only workspace admins can create PATs. If you’re not an admin, ask one to create a token for you.
Step 2 — Find the agent ID and a model ID
Every agent has a unique ID. The easiest way to grab it: open the agent in the auxilia UI and copy the ID from the URL.
https://your-auxilia-host/agents/3f8a1c22-9b1e-4f9a-b2f0-cafeface1234/chat
                                 └──────────────── this is the agent ID
A thread is also pinned to a model, and threads created over the API do not inherit the workspace default — a thread without a model is refused at run time (no model is set). List the models available to you and pick one (the workspace default carries isDefault: true):
curl -s https://your-auxilia-host/api/backend/model-providers/models \
  -H "Authorization: Bearer YOUR_PAT"
# [{"id": "claude-haiku-4-5", "name": "Claude Haiku 4.5", "isDefault": true, ...}, ...]
All API paths in this page go through the web app’s proxy, so they start with /api/backend. If you address the backend service directly, drop that prefix.
Step 3 — Create a thread
A thread is the conversation. Create one for the agent and model you picked:
curl -s -X POST https://your-auxilia-host/api/backend/threads/ \
  -H "Authorization: Bearer YOUR_PAT" \
  -H "Content-Type: application/json" \
  -d '{
    "agent_id": "3f8a1c22-9b1e-4f9a-b2f0-cafeface1234",
    "model_id": "claude-haiku-4-5"
  }'
The response is the thread; keep its id:
{
  "id": "0b1c6f9e-…",
  "agent_id": "3f8a1c22-9b1e-4f9a-b2f0-cafeface1234",
  "model_id": "claude-haiku-4-5",
  "source": "api",
  "created_at": "2026-09-23T08:00:00Z",
  ...
}
You may pass your own "id" (any unique string) if your system prefers to choose it. Threads created with a PAT show up in the auxilia UI like any other conversation, with source = api.
Step 4 — Send a message and wait for the answer
POST /threads/{thread_id}/runs/invoke starts a run and blocks until it finishes, then returns the agent’s final answer:
curl -s -X POST https://your-auxilia-host/api/backend/threads/0b1c6f9e-…/runs/invoke \
  -H "Authorization: Bearer YOUR_PAT" \
  -H "Content-Type: application/json" \
  -d '{
    "input": {
      "messages": [
        { "type": "human", "content": "Summarize yesterday'\''s HubSpot deals closed over $10k" }
      ]
    }
  }'
{
"content": "Three deals closed yesterday above $10k: …",
"structured_response": null
}content is the agent’s prose answer. The tool calls it made along the way are visible in the thread in the auxilia UI (and in Langfuse if enabled).
Structured output
Add an output_schema (a JSON Schema object) and the run ends with a formatting step; the parsed object comes back in structured_response, validated against your schema:
{
  "input": { "messages": [{ "type": "human", "content": "Classify this ticket: …" }] },
  "output_schema": {
    "type": "object",
    "properties": {
      "priority": { "type": "string", "enum": ["low", "medium", "high"] },
      "team": { "type": "string" }
    },
    "required": ["priority", "team"]
  }
}
This is the shape to use when a spreadsheet cell or a workflow branch needs a value, not a paragraph.
Passing a follow-up message
Context lives in the thread. To continue the conversation, call runs/invoke again on the same thread id:
{ "input": { "messages": [{ "type": "human", "content": "Now break that down by sales rep" }] } }Create a new thread whenever you want a fresh start — each thread has its own memory.
What about approvals?
runs/invoke only returns on a successful run. If your agent calls a tool set to needs approval, the run pauses on that interrupt and the request fails with Run did not complete (interrupted) — nobody is there to click Approve. For unattended automation, review the agent’s tool settings and put the tools it needs on Always allow (or use a dedicated automation agent with a tighter tool list).
Errors you may see
| Status | Body | Meaning |
|---|---|---|
401 | {"error": "oauth_required", "auth_url": "…"} | An OAuth MCP server bound to the agent isn’t connected for the token’s user. Open auth_url in a browser once (signed in as that user), then retry. |
404 | — | The thread doesn’t exist or isn’t yours. |
409 | {"error": "model_unavailable", …} | The thread’s model is disabled or its provider key is missing. |
409 | {"error": "sandbox_unavailable", …} | The agent’s sandbox can’t be reached — see Sandbox. |
500 | {"detail": "Run did not complete (…)"} | The run ended without a success: interrupted (approval needed), cancelled, timed out, or failed. |
Step 5 — Put it somewhere useful
Once the two requests work from your terminal, you can wire them into almost anything:
- A Zapier, Make, or n8n workflow — “when a form is submitted, send the answer to an agent, post the reply to Slack”
- A Google Sheets script — “for each row, ask the agent to classify the customer, write the answer in column D” (use
output_schema) - A webhook from your product — “when a new support ticket arrives, have the agent draft a first-line reply”
- A schedule — prefer built-in Triggers; use an external scheduler only when the schedule has to live elsewhere
See Use auxilia from n8n & Cloud Scheduler for a step-by-step of each, and Embed an agent in a custom UI if you want the answer streamed token by token instead of returned at the end.